- First, have you registered for your expenses account?
- Log in to your expense account on Continia
- Claim expenses - start your expense report
- Claim expenses - add expenses to your expense report
- Claim expenses - add mileage
- View and edit ‘open’ expense reports
- Submit your expense report for payment
- Track the status of your submitted expense report
- Want to use the mobile app?
The Continia Expense Management Portal is a cloud-based solution designed to simplify and automate the process of expense management for businesses. The software allows users to capture, submit, and track expenses from anywhere, anytime, using a web browser or a smartphone app.
You can claim expenses incurred on College business, including meals, accommodation and travel (including mileage). Please refer to our expenses policy for clarity on what you can claim for.
First, have you registered for your expenses account?
The first step is to register for expenses. You need to this via your RCPCH online account on this website, where you will also add details of the UK or overseas bank account you are using, and then get an email with the link to activate your expenses account. It's quick and easy, and we have instructions.
How to register for your expenses
Log in to your expense account on Continia
The first time you log in to Continia, the online expenses system, you'll need to click on the link in the email you get when you first register (see above section). You'll set your password, and then you can log in.
You can log in to your expense account on Continia at any time - you may like to bookmark the link in your browser.
Log in to your expense account
Claim expenses - start your expense report
Once logged in, you'll see your expense account dashboard.
To start a claim, you'll need to create an expense report. This can have one or more individual expenses.
Click New at the top left.

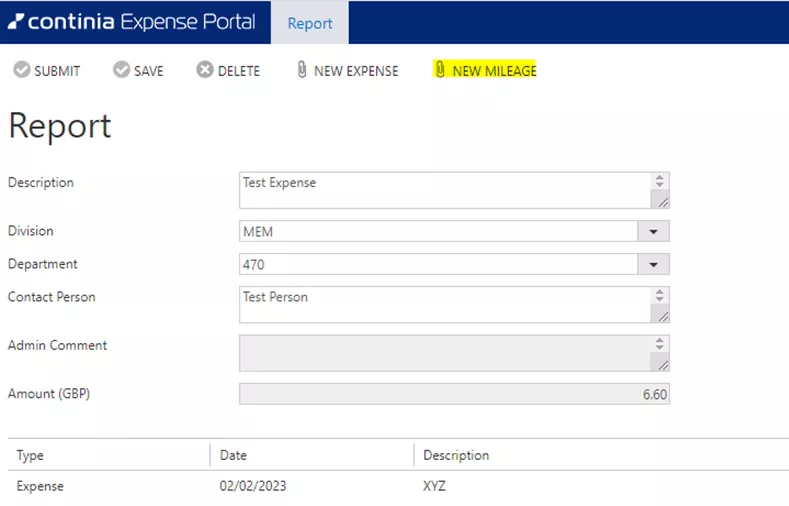
Complete the fields in the report. If you're not sure how to complete all of these, speak with your College staff contact for help.
- Description - Add a description that is relevant to you and the reason for the expense - if you claim expenses multiple times, a good description will make it easier for you to find the relevant claim
- Division - Select the RCPCH Division
- Department - Select the RCPCH Department (team)
- Contact person - Add the name of your College staff contact

Claim expenses - add expenses to your expense report
On the Expense Report, click New Expense.
You'll see the following screen where you can upload a receipt(s)/other document(s) and add details about the expense.

You can start entering details in the form, or you can start by adding a receipt(s) and/or other document(s) for this expense.
Upload your receipt/other document
Use the Drag & and drop files here option, or click or tap to browse and select the file from your device. (This can be a photograph of the receipt.) The system uses Optical character recognition (OCR) technology to capture the amount, currency date and description from the uploaded file - these details are added to the form. If this does not capture all details, or gets anything wrong, you can edit these fields.
If you complete the fields before you upload a file, you'll see a message asking if you want to overwrite the existing values. You can select No (as you’ve completed already).
This is what it looks like:

If needed, you can upload additional document(s) about this expense as needed. This will not override your first uploaded file nor what you entered into the form. (Any additional uploads should not be receipts for other expenses.)
Complete all required fields
- Amount - Amount of this expense
- Currency
- Document date - Date of this expense
- Payment type - This defaults to cash/private card
- Division and Department are automatically populated from the previous screen
- Description - Any other details. If the receipt is related to a date range, add this here
When you're finished, click Save.
Add another expense to this report
After you save your expense, you'll go back to the Expense Report page:

You can add more expenses to this same report. Just follow the same steps as above.

Claim expenses - add mileage
Once you've created an Expense Report, you can add mileage expenses to it. From the Expense Report, click New mileage.
You'll see the Mileage screen. In From, start typing the postcode/location or enter the full postcode. Do the same in To. This will calculate the distance travelled - though you can edit this if you have travelled further than what is estimated.

Complete Date, Description, Division and Department.

Click Save. You will have three options:

- Save - This completes this expense, and takes you back to the expense report.
- Save and create return trip - This auto-populates the mileage claim for the return journey, based on the locations entered from the outbound journey on the previous screen. You'll need to change the date if needed. Again, click Save.
- Save and continue form - This allows you to add another mileage expense to this expense report.
View and edit ‘open’ expense reports
From your dashboard, you can view and edit open expense reports before you submit them. (Remember, the Open reports are draft and have not been submitted for approval and payment.)
Go to Open. Select the report you wish to view or edit.

Click Edit, then select the expense you want to update. You can now edit the details or add or remove uploads as you need.

Click Save.

Submit your expense report for payment
When you have added all of your expenses, including the receipts / other documents, to the expense report, you're ready to submit it.
Click Submit. Your report will be sent to the relevant RCPCH staff member for review and approval.

Track the status of your submitted expense report
After you submit your expense report, you can track it. From the dashboard, click the clicking the small arrow next to Open and select History.

You can see the status of your submitted expense report(s), including comments from the approver.

Want to use the mobile app?
You can also use the Continia mobile app to claim and track your expenses. We have instructions on how to download and use the app.